HTML5
标签
1 |
声明
基础骨架标签
1 | <html></html> |
标题标签
1 | <h1></h1> |
h1最重要,h6最不重要
位置设置
1 | <h1 align="left">one</h1> |
默认left
段落标签
1 | <p></p> |
图片标签
1 | <img src="" alt="" width="" height="" title=""> |
超文本链接
1 | <a href=url>名称</a> |
没点过是蓝色,点过变成紫色
文本标签
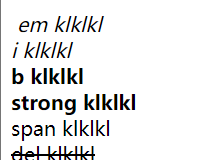
显示不一样的文字,与段落标签不同,文本标签仅仅是为了词汇文本,可以嵌套
1 | <em> em klklkl</em> //着重 斜体 |
列表标签
有序列表
1 | <ol> |
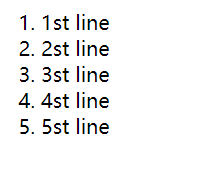
1 | <ol type=""> |
type可以为: 1, a, A, i, I
可以嵌套
1 | <li>2st line |
无序列表
1 | <ul> |
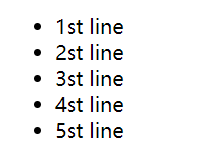
1 | <ul type="">// disc默认实心圆 circle空心圆 square小方块 none不显示 |
和有序标签一样可以嵌套
可以实现导航效果(css)
表格标签
1 | 表格:<table> |
1 | <table> |
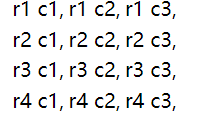
1 | 快速生成表格:table>tr*[num]>td*[num]{内容} |
表格属性
1 | <table [属性]="" [属性]="" [属性]=""> |
常用属性
border : 边框
width :宽度
height :高度
表格单元格合并
水平合并: colspan 保留左边删除右边
垂直合并: rowspan 保留上边删除下边
1 | <tr clospan="[num]"></tr> |
容器标签
1 | <div > </div> |
分区
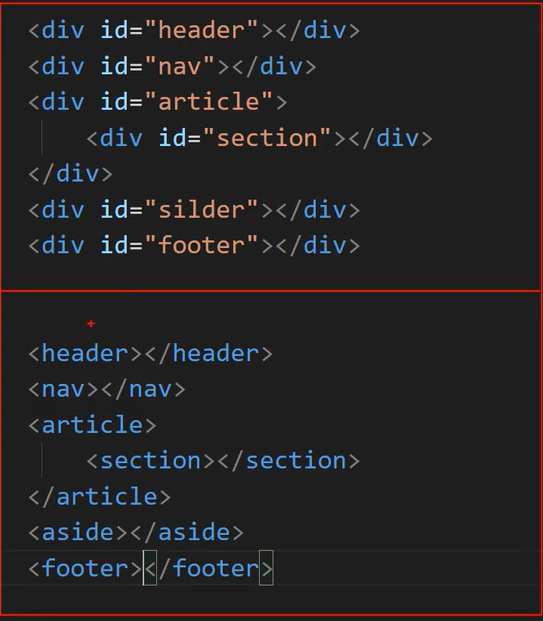
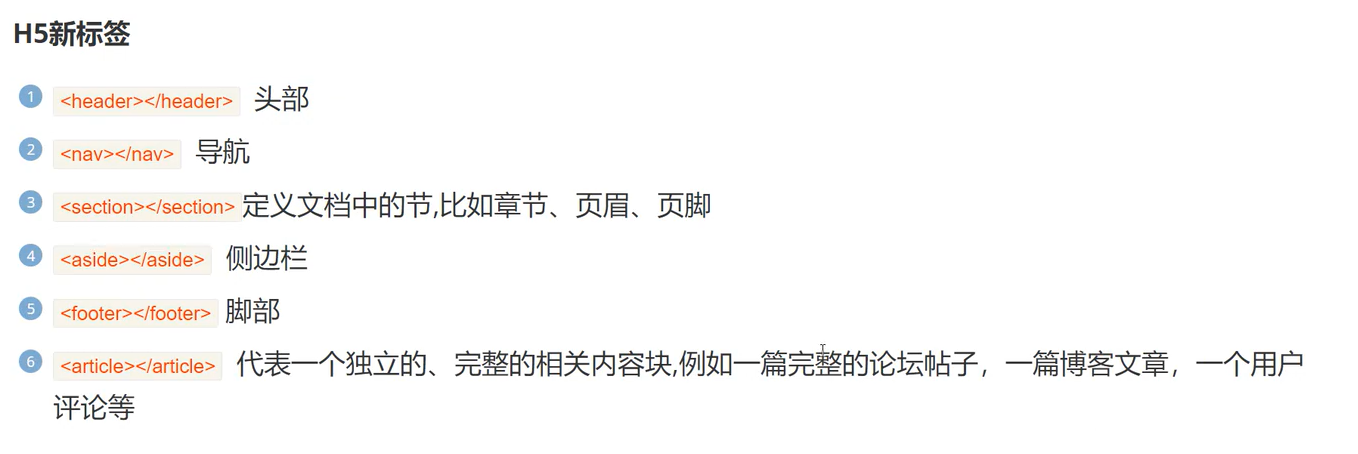
但是,H5新标签对浏览器有要求
Form表单
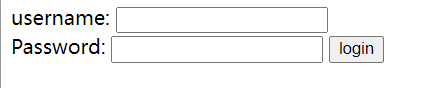
用户输入,使网页具有交互性,例如: 登录注册 搜索框
容器+控件
1 | <form action="" method="" name="" > </form> |
- action:服务器地址
- method:数据的提交方式 get / post
- name:表单名称
表单元素
表单标签 表单域 表单按钮
1 | <form action="" method="" name="" > |
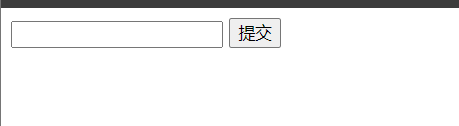
文本框
文本域通过
<input type="text">标签进行设定,当用户需要向表单中键入字母 数字等内容时,会用到文本域
1 | <form method="" name="" > |

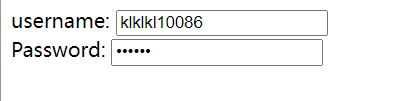
密码框
<input type="password">进行设定,密码字段字符不会明文显示,而是以星号或者圆点替代
1 | <form method="" name="" > |
提交按钮
用户点击确认按钮的时候,表单的内容会被传送到另一个文件,表单的动作属性定义了目的文件的文件名,由动作属性定义的这个文件会对接收到的输入进行相关处理
1 | <form method="" name="" > |
块级元素与行内元素(内联元素)
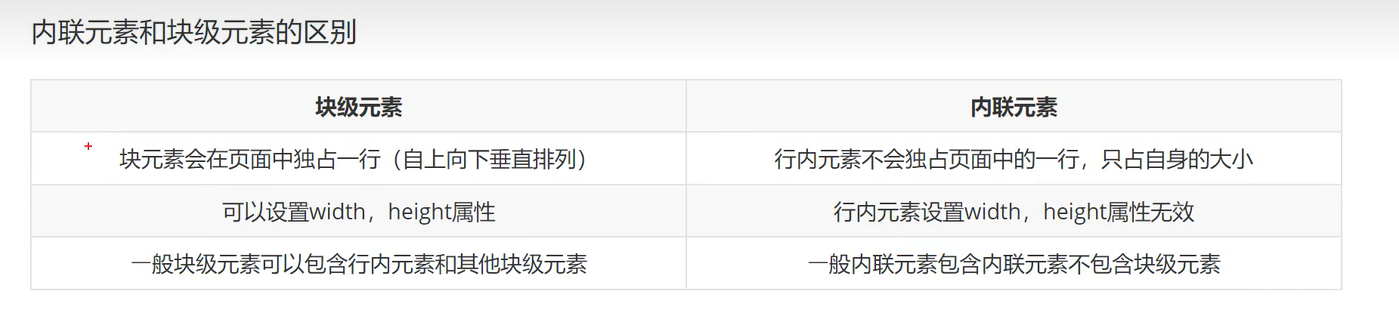
常见的块级元素
div form h1-h6 hr p table ul ol …
常见行内元素
a b em i span strong…
行内快级元素(特点:不换行 能够识别宽高)
button img input …
CSS
美化器
语法
选择器 + 声明(样式)
选择器选择HTML元素,一个声明由一个属性和一个值组成
1 | <style> |
引入方式
内联样式
在head中进行书写,对head所在的网页的元素进行设置
1 |
|
当网页跳转后,样式设置会失效
内部样式
1 | <h3 style="color: blue;"> title </h3> |
外部样式

1 | <link rel="stylesheet" href="./try.css"> |
在head标签中书写,表示对整个网页应用href的样式
选择器
全局选择器
可以与任何元素匹配,优先级最低,一般做样式的初始化
1 | *{ |
元素选择器
p b div a img body
1 | span{ |
1 |
|
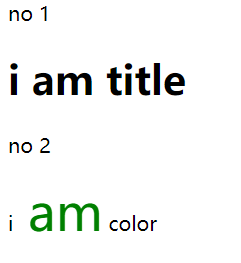
所有的标签都可以是选择器
选择的是所有
类选择器
规定用圆点来定义,针对你想要的所有标签使用,较为灵活
1 | .content{ |
1 |
|
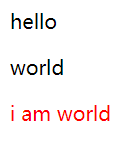
- 类选择器可以被多种标签使用
- 类名不能以数字开头
- 同一个标签可以使用多个类选择器,用空格隔开
1 | .content{ |
ID选择器
针对某一个特定的标签来使用,只能使用一次,以
#定义,id只能重复一次
1 |
|
合并选择器
提取共同的样式,减少代码重复
语法:选择器1,选择器2…{}
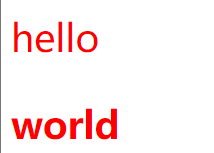
1 |
|
优先级
| 选择器类型 | 格式 | 权重 |
|---|---|---|
| 全局 | * | |
| 元素 | 标签名字 | 1 |
| 类 | claa名字(.) | 10 |
| ID | id名字(#) | 100 |
行内样式>ID选择器>类选择器>元素选择器,相同优先级后写的生效
字体属性
颜色 大小 加粗 文字样式
color
1 | color:red; |
font-size
字体大小
1 | font-size:100px; |
chorm浏览器接受的最小字体是12px
font-weight
字体粗细
1 | font-weight:[value]; |
| 值 | 描述 |
|---|---|
| bold | 粗体 |
| bolder | 更粗 |
| lighter | 更细 |
| 100-900 | 由细到粗 400为默认 700等价于bold |
font-style
字体样式
1 | font-style:[value]; |
| 值 | 样式 |
|---|---|
| normal | 默认值 |
| italic | 斜体 |
font-family
指定元素字体
1 | font-family: "微软雅黑"; |
背景属性
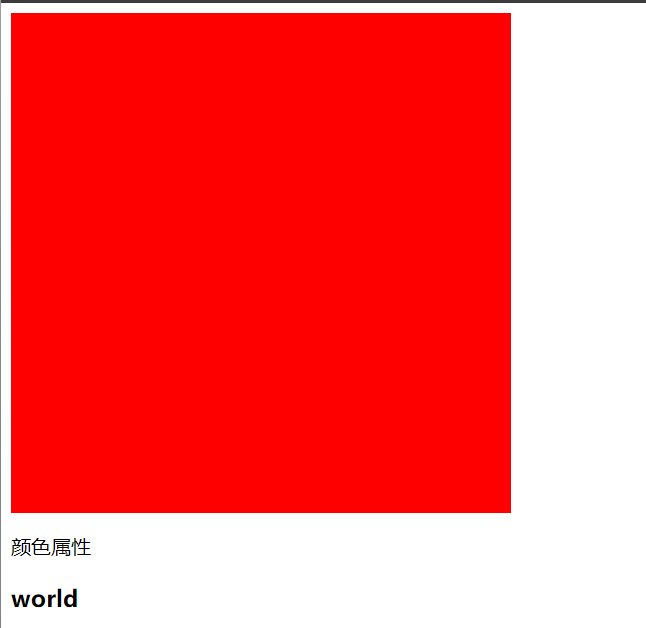
background-color
1 |
|
background-image
设置元素背景图片
1 |
|
background-repeat
设置如何平铺图像
| 值 | 说明 |
|---|---|
| repeat | 默认值 |
| repeat-x | 只水平方向平铺 |
| repeat-y | 只垂直方向 |
| no-repeat | 不平铺 |
1 |
|
background-size
1 | background-size:100px,100px; |

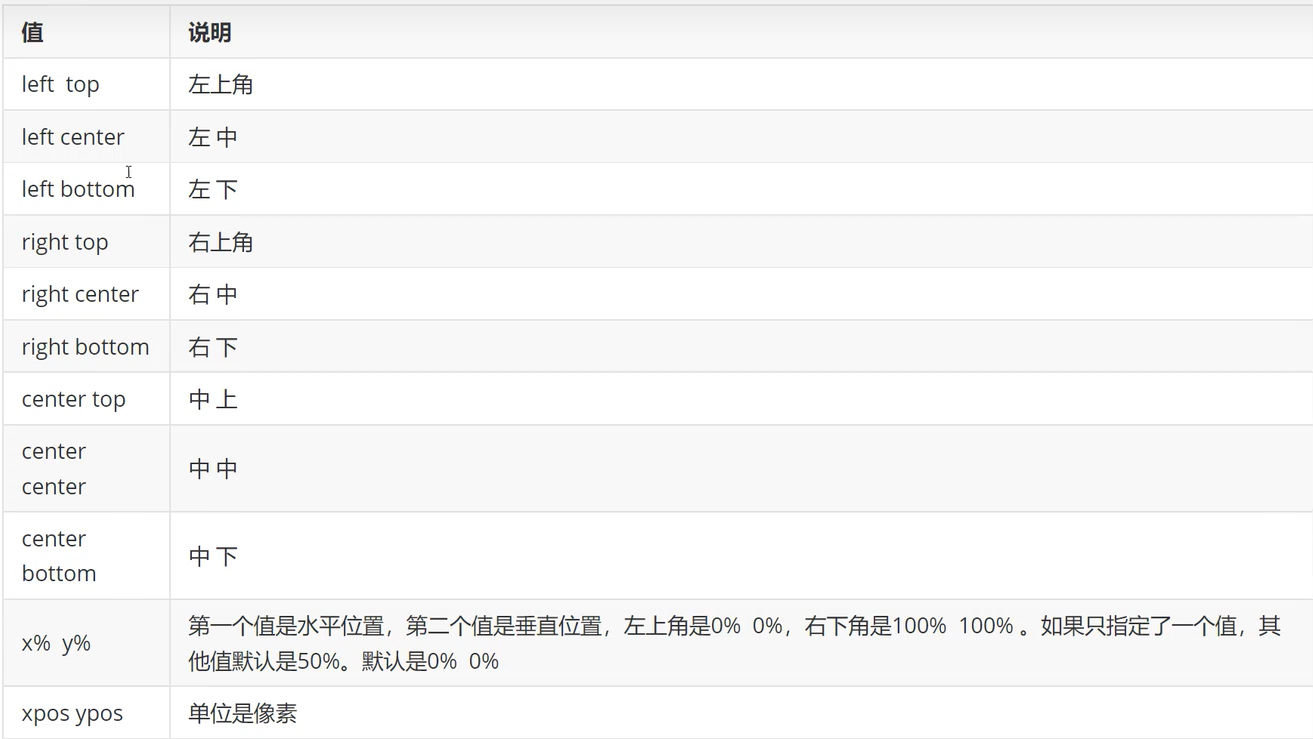
background-position
设置图像的起始位置,默认为 0 % 0%
文本属性
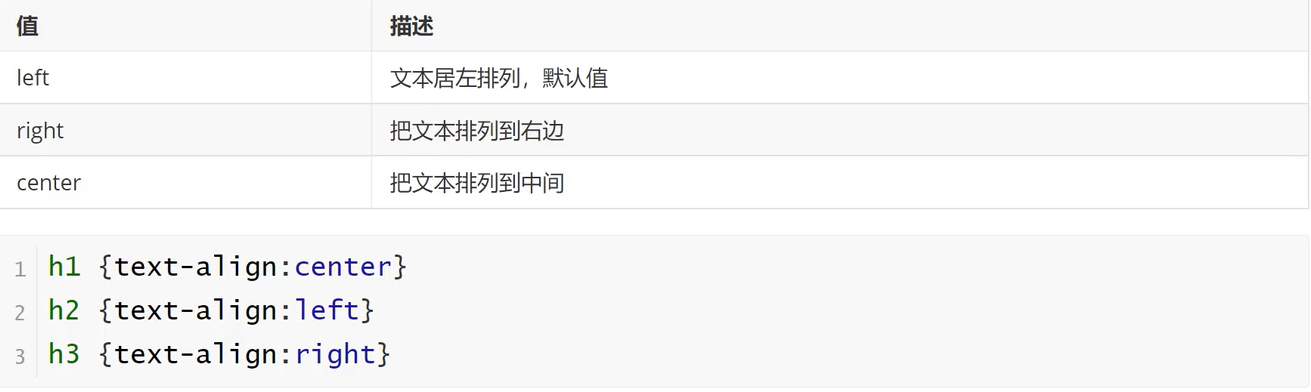
text-align
指定文本的对齐方式
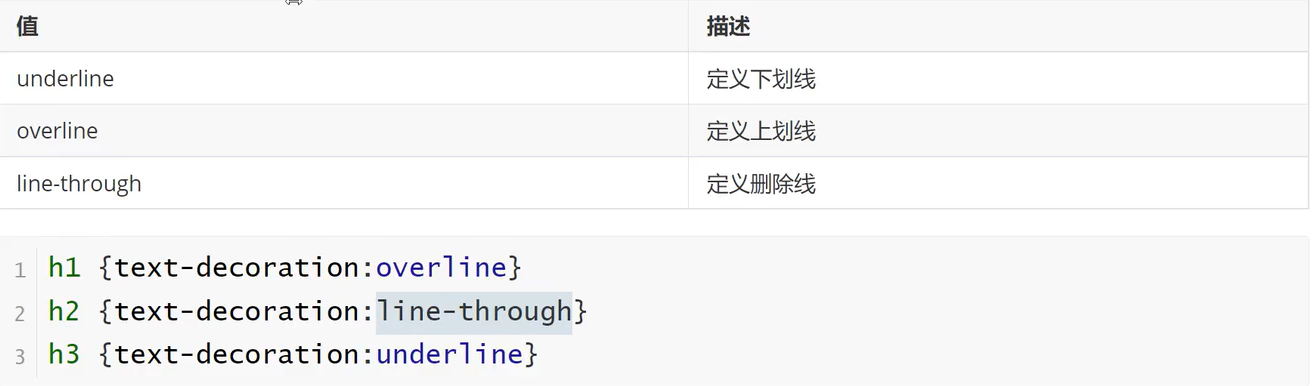
text-decoration
上划线 下划线 删除线等
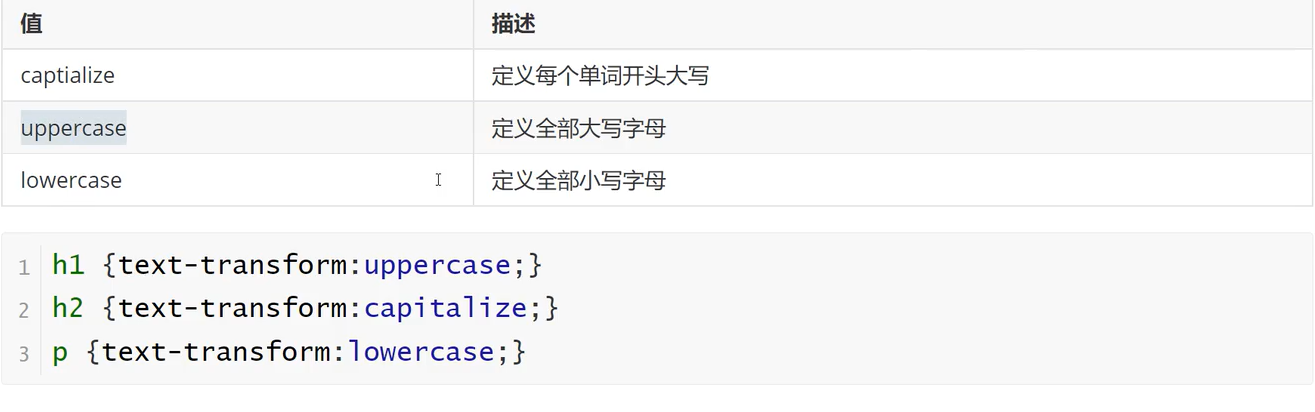
text-transform
控制文本大小写
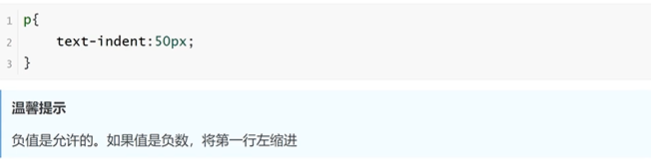
text-indent
规定文本块首行文本缩进
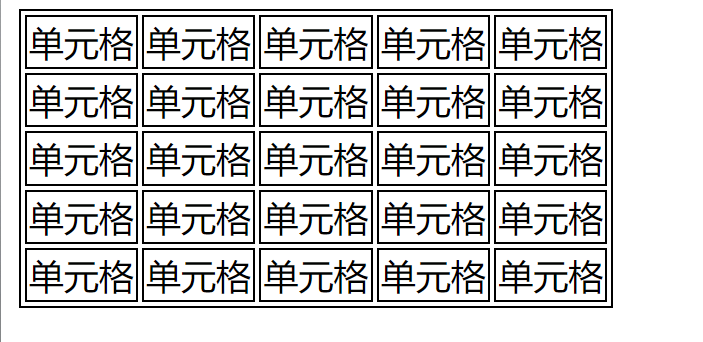
表格属性
表格边框
1 | table,td{ |
折叠边框
让表格被单一的边框隔开
1 | table{ border-collapse:collapse ;} |
大小
1 | table{ width:100px ; |
表格文字对齐方式
1 | td{text-align:center; } |
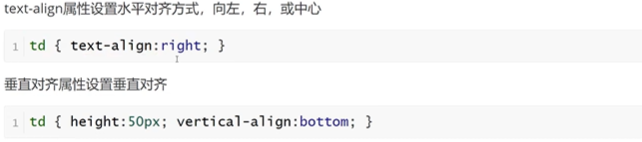
表格填充
控制空格之间的边框
1 | td{padding:15px; } |
表格颜色
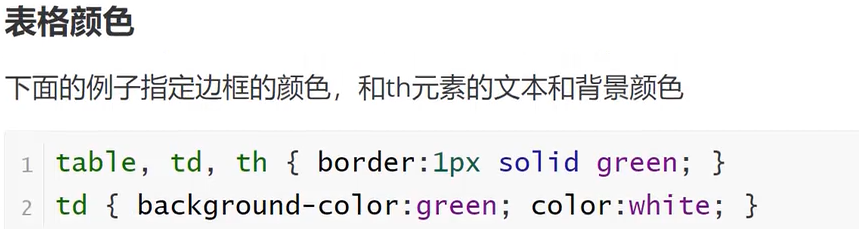
关系选择器
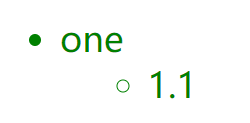
后代选择器
1 | E F{} |
1 | <!DOCTYPE html> |
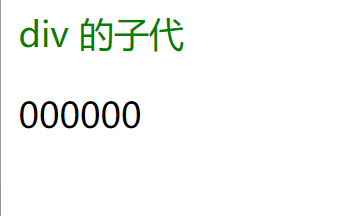
子代选择器
1 | E>F{} |
选择E标签的直接子代标签
1 | <!DOCTYPE html> |
相邻兄弟选择器
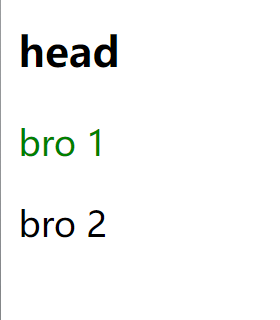
1 | E+F{} |
选择E相邻的F标签,只能向下选择
1 |
|
通用兄弟选择器
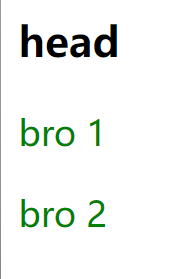
1 | E~F{} |
选择E下面所有为F标签的兄弟元素
1 |
|
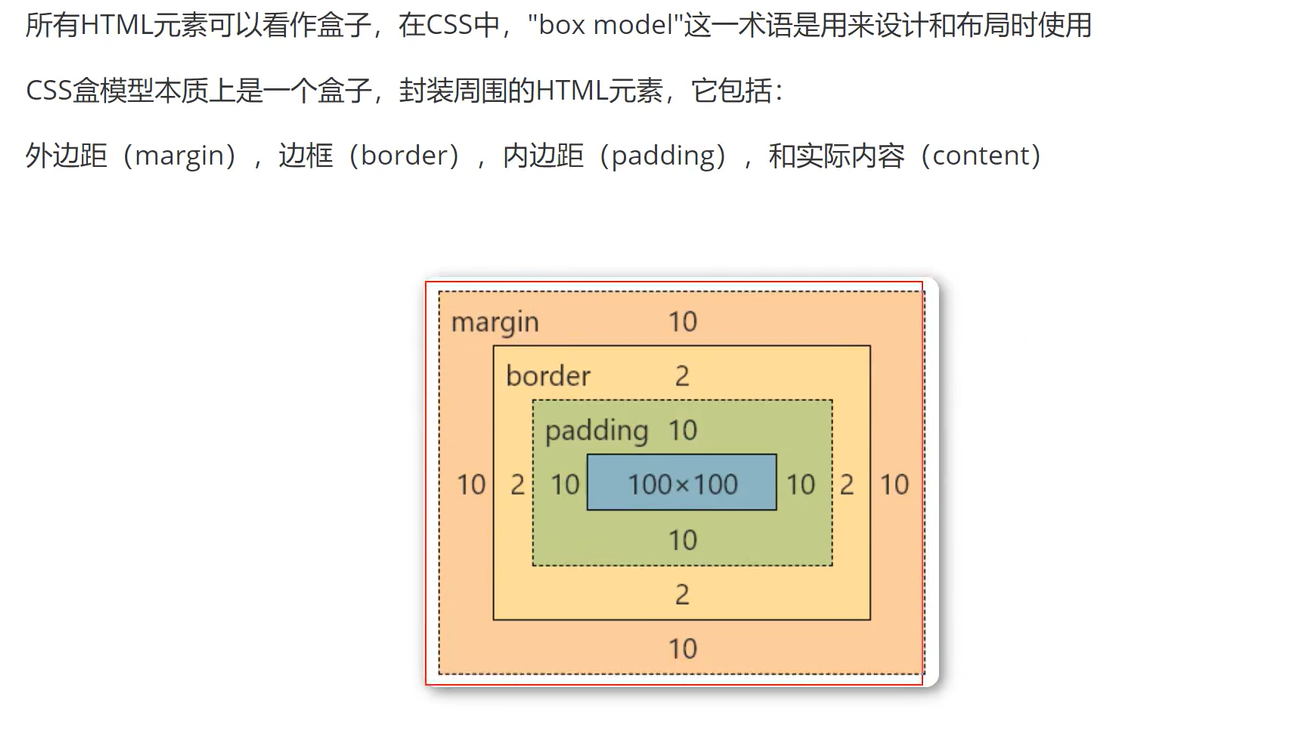
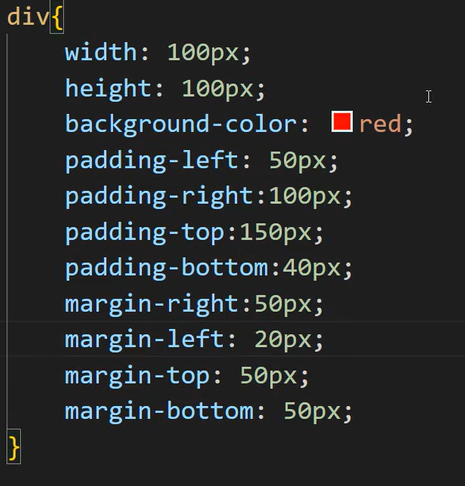
盒子模型

弹性盒模型
弹性盒子由弹性容器(Flex container)和弹性子元素(Flex item)组成。
弹性容器通过设置 display 属性的值为 flex 或 inline-flex将其定义为弹性容器。
弹性容器内包含了一个或多个弹性子元素。
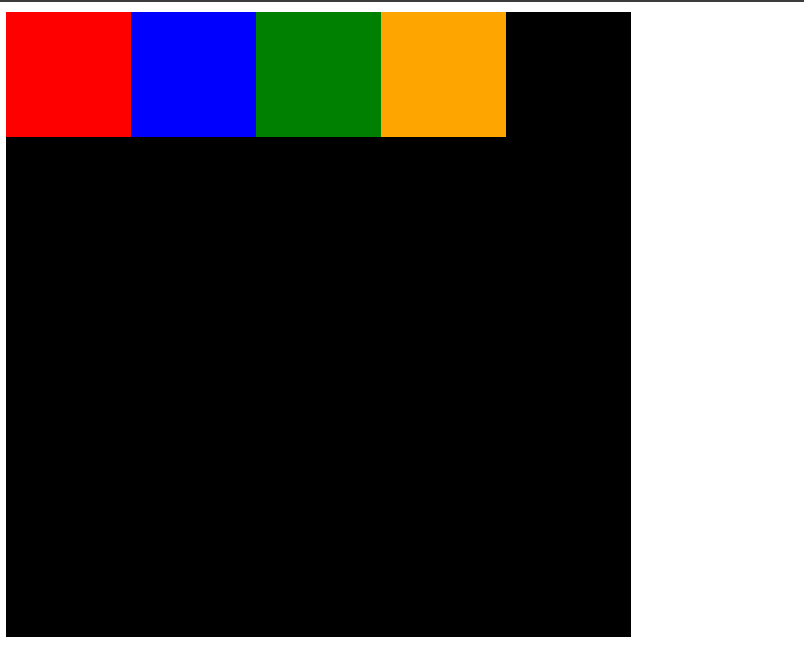
弹性子元素在弹性盒子内默认横向摆放
1 | <!DOCTYPE html> |
弹性容器的属性
flex-direction
决定弹性项目的主轴方向(水平或垂直):
-
row:主轴为水平方向,项目从左到右排列(默认值)。 -
row-reverse:主轴为水平方向,项目从右到左排列。 -
column:主轴为垂直方向,项目从上到下排列。 -
column-reverse:主轴为垂直方向,项目从下到上排列。1
2
3
4
5
6
7.container{
width:500px;
height:500px;
background-color: black;
display:flex;
flex-direction: column;
}
justify-content
控制弹性项目在主轴上的对齐方式(垂直方向上进行控制):
flex-start:项目向主轴起点对齐。(默认)flex-end:项目向主轴终点对齐。center:项目在主轴上居中。space-between:项目在主轴上均匀分布,第一项靠起点,最后一项靠终点。space-around:项目在主轴上均匀分布,项目两侧有相同的间距。
1 | .container{ |
align-items
控制弹性项目在交叉轴(与主轴垂直的轴)上的对齐方式(水平方向进行控制):
-
stretch:默认值,项目在交叉轴上拉伸以填满容器(如果未设置固定高度)。 -
flex-start:项目向交叉轴的起点对齐。 -
flex-end:项目向交叉轴的终点对齐。 -
center:项目在交叉轴上居中。1
2
3
4
5
6
7
8
9.container{
width:500px;
height:500px;
background-color: black;
display:flex;
flex-direction: column;
justify-content: center;
align-items: center;
}
flex-wrap
控制弹性项目是否换行:
nowrap:项目不换行,超出容器的内容会溢出(默认值)。wrap:项目自动换行。
弹性项目的属性
flex-grow
控制项目的放大比例,如果所有项目的 flex-grow 为1,它们将等比例分配剩余空间。
优先级大于宽度的优先级
flex-shrink
控制项目的缩小比例,当容器空间不足时,项目将按该比例缩小。
flex-basis
定义了项目在主轴方向上的初始大小。
浮动
CSS中的浮动(
float)是一种用于布局的机制,可以将元素从正常的文档流中取出,使其在容器的左侧或右侧浮动。浮动元素允许文本和其他内联元素环绕在其周围,常用于实现文本环绕图片、多列布局等效果。
基本语法
1 | .element { |
1 | <!DOCTYPE html> |

设置为浮动之后
1 | <!DOCTYPE html> |

浮动元素脱离了文档流,在上层显示
float 属性的值
left:元素向左浮动,后续内容环绕在元素的右侧。可以利用此点让元素横向摆放right:元素向右浮动,后续内容环绕在元素的左侧。none:默认值,元素不浮动,遵循正常的文档流。inherit:继承父元素的浮动属性。
浮动的特点
- 脱离文档流:浮动元素不占据正常文档流的位置,后续的块级元素会忽略它的存在。
- 文本环绕:内联元素(如文本)会围绕在浮动元素的周围。
- 影响父容器高度:如果父容器内的所有子元素都浮动,父容器的高度可能会塌陷为0。
- 当容器不足以横向摆放时会放到下一行
- 只有左右浮动没有上下
清除浮动
由于浮动元素会影响后续元素的布局,常需要清除浮动以恢复正常的文档流。使用 clear 属性可以指定元素的哪一侧不允许浮动元素。
1 | .element { |
left:元素的左侧不允许有浮动元素。right:元素的右侧不允许有浮动元素。both:元素的左右两侧都不允许有浮动元素。none:默认值,允许浮动元素出现在两侧。
常用方法
-
添加清除元素
1
2
3
4
5
6
7
8
9
10<div class="container">
<div class="float-element"></div>
<div class="clear"></div>
</div>
<style>
.clear {
clear: both;
}
</style> -
使用伪对象清除浮动
1
2
3
4
5.container::after {
content: "";
display: table;
clear: both;
} -
使用
overflow属性(使用较多)1
2
3
4.container {
overflow: hidden;
clear:both;
}
示例
图片左浮动,文字环绕
1 | <img src="image.jpg" alt="示例图片" style="float: left; margin-right: 10px;"> |
TIPS:
- 父容器高度塌陷:如果所有子元素都浮动,父容器可能会高度塌陷,需要清除浮动。
- 布局复杂性:过度使用浮动可能导致布局混乱,现代布局中更推荐使用 Flexbox 或 Grid。
- 兼容性:浮动在所有主流浏览器中都得到良好支持,但在响应式设计中需要谨慎使用。
定位
CSS 中的定位(Positioning)用于确定 HTML 元素在页面上的布局位置。定位方式有多种,分别适用于不同的场景。常见的定位方式有以下五种:
静态定位(static)
- 默认值:每个 HTML 元素默认使用
static定位。 - 特点:
- 不进行特殊定位,元素按照文档流正常排列。
- 元素不会受
top、right、bottom、left属性的影响。
示例:
1 | div { |
相对定位(relative)
- 特点:
- 元素相对于它在文档流中的正常位置进行定位。
- 使用
top、right、bottom、left来偏移元素,但元素仍然占据原本的空间。 - 相对定位不会影响其他元素的位置。
示例:
1 | div { |
绝对定位(absolute)
- 特点:
- 元素相对于 最近的非
static定位的祖先元素(或视口,如果没有这样的祖先元素)进行定位。 - 元素会脱离文档流,其他元素会忽略它的存在。
- 可以通过
top、right、bottom、left属性精确控制位置。
- 元素相对于 最近的非
示例:
1 | div { |
固定定位(fixed)
- 特点:
- 元素相对于 浏览器视口 进行定位,即使页面滚动,元素的位置也不会发生变化。
- 元素脱离文档流,类似
absolute定位。 - 常用于创建固定导航栏或浮动按钮。
示例:
1 | div { |
粘性定位(sticky)
- 特点:
- 元素在页面滚动时表现为 相对定位,当滚动到特定位置后则表现为 固定定位。
- 通过
top、right、bottom、left指定何时触发固定定位。 - 常用于创建粘性导航栏或某些随页面滚动的 UI 元素。
示例:
1 | div { |
堆叠顺序(z-index)
- 当元素使用
relative、absolute、fixed或sticky定位时,可以通过z-index属性控制元素的堆叠顺序。 z-index值越大,元素越靠前。- 只对定位元素生效。
示例:
1 | div { |
定位方式的对比:
static:默认,不参与定位,元素按文档流正常排列。relative:相对自身位置的偏移,仍在文档流中占位。absolute:脱离文档流,相对于最近的非static祖先定位。fixed:相对于视口定位,脱离文档流,页面滚动时位置不变。sticky:结合相对与固定定位,滚动到指定位置后固定。
相对定位和绝对定位是相对 具有定位的父级元素 进行位置调整,如果父级元素不存在定位,则逐级向上寻找,直到顶层文档
css新特性
圆角border-radius
1 | .containner{ |

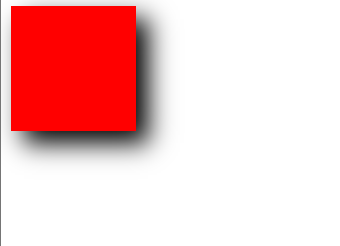
阴影box-shadow
1 | .containner{ |
动画
让元素从一种样式逐渐变成另一种样式
雪碧图
字体图标
JavaScript
JavaScript 是一种轻量级、解释型的编程语言,主要用于开发网页前端功能。
基础知识
变量
var
let:声明一个可以改变的变量。
const:声明一个不可重新赋值的常量。
1 | var num = 10;//用var声明 |
输出方式
弹出框
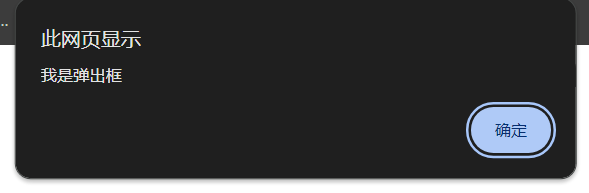
1 | alert("我是弹出框"); |
页面输出
1 | document.write("我是输出到页面"); |
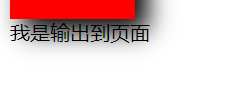
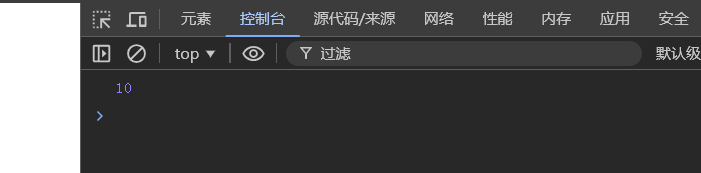
控制台输出(常用)
1 | console.log(num) |
变量提升
变量提升(Hoisting)是 JavaScript 的一个默认行为,它将变量声明提升到其作用域的顶部,换句话说,在代码执行之前,JavaScript 会将变量声明(而不是赋值)提升到作用域的顶部。
使用 var 进行变量声明
当你使用 var 声明变量时,JavaScript 会将变量声明提升到当前作用域的顶部,但不会提升赋值部分。如下例子:
1 | console.log(a); // 输出 undefined |
上面的代码在执行时,实际上相当于这样:
1 | var a; // 变量声明被提升到了顶部 |
let 和 const 不存在提升(或提升但不能使用)
在 let 和 const 声明的变量中,虽然也有提升,但它们会被暂时锁定在一个“暂时性死区”(Temporal Dead Zone,TDZ)中,在声明之前访问它们会导致错误:
1 | console.log(b); // ReferenceError: Cannot access 'b' before initialization |
这里,变量 b 是在它的声明之前访问的,JavaScript 引擎会抛出错误,因为 let 和 const 变量在声明之前是不可访问的。
函数提升
函数声明也会被提升,并且它们会在整个作用域内都可以使用:
1 | greet(); // 输出 "Hello" |
上面的代码会正常工作,因为函数声明也会被提升到作用域的顶部。
tips:
var变量提升:变量声明被提升,但赋值不会被提升,未赋值时默认值为undefined。let和const:变量声明提升但在“暂时性死区”内,无法在声明前访问。- 函数声明提升:完整的函数声明会被提升,但函数表达式不会。
数据类型
JavaScript 支持多种数据类型:
- 原始类型:
Number(数字),String(字符串),Boolean(布尔值),null,undefined,Symbol。 - 复杂类型:
Object,包括数组、函数等。
1 | let num = 42; // Number |
null 和 undefine 没有什么特殊意思,只是表示空
js引入到文件
嵌入HTML文件中
1 | <body> |
引入本地独立js文件
1 | <body> |
引入网络来源文件
1 | <head> |
typeof运算符
判断基本数学类型
1 | let x = 42; |
- 对于
null,typeof null返回"object",这是一个已知的语言设计问题,通常可以通过额外的检查来处理。 typeof可以用来动态检查变量类型,避免某些类型相关的错误。
算术运算符
| 运算符 | 名称 | 描述 | 示例 | 结果 |
|---|---|---|---|---|
+ |
加法 | 两个值相加 | 5 + 3 |
8 |
- |
减法 | 两个值相减 | 5 - 3 |
2 |
* |
乘法 | 两个值相乘 | 5 * 3 |
15 |
/ |
除法 | 两个值相除 | 9 / 3 |
3 |
% |
取模(余数) | 除法的余数 | 10 % 3 |
1 |
++ |
自增 | 变量的值增加1,前置(++x)或后置(x++) |
x++ |
x = 6 |
-- |
自减 | 变量的值减小1,前置(--x)或后置(x--) |
x-- |
x = 4 |
** |
幂运算 | 表示某个数的幂(指数) | 2 ** 3 |
8 |
- |
负号 | 取负数 | -x |
-5 |
tips:
- 自增/自减运算符(
++/--):可以放在变量前面或后面。前置自增/自减会先执行运算,再返回值;后置则先返回值,再执行运算。 - 取模运算符(
%):返回除法的余数,常用于判断奇偶性或循环中的边界条件。
赋值运算符
| 运算符 | 名称 | 描述 | 示例 | 结果 |
|---|---|---|---|---|
= |
简单赋值 | 将右侧的值赋给左侧的变量 | x = 5 |
x = 5 |
+= |
加法赋值 | 将右侧的值加到左侧的变量上,并将结果赋给左侧变量 | x += 3 |
x = x + 3 |
-= |
减法赋值 | 将右侧的值从左侧的变量中减去,并将结果赋给左侧变量 | x -= 3 |
x = x - 3 |
*= |
乘法赋值 | 将左侧变量与右侧的值相乘,并将结果赋给左侧变量 | x *= 3 |
x = x * 3 |
/= |
除法赋值 | 将左侧变量除以右侧的值,并将结果赋给左侧变量 | x /= 3 |
x = x / 3 |
%= |
取模赋值 | 将左侧变量除以右侧的值,赋值为余数 | x %= 3 |
x = x % 3 |
**= |
幂赋值 | 将左侧变量取右侧值的幂,并将结果赋给左侧变量 | x **= 2 |
x = x ** 2 |
<<= |
左移赋值 | 将左侧变量的二进制表示左移指定的位数,并赋值给左侧变量 | x <<= 2 |
x = x << 2 |
>>= |
右移赋值 | 将左侧变量的二进制表示右移指定的位数,并赋值给左侧变量 | x >>= 2 |
x = x >> 2 |
>>>= |
无符号右移赋值 | 将左侧变量的二进制表示无符号右移指定的位数,赋值给左侧 | x >>>= 2 |
x = x >>> 2 |
&= |
按位与赋值 | 将左侧变量与右侧值进行按位与运算,并将结果赋值给左侧变量 | x &= 3 |
x = x & 3 |
| ` | =` | 按位或赋值 | 将左侧变量与右侧值进行按位或运算,并将结果赋值给左侧变量 | `x |
^= |
按位异或赋值 | 将左侧变量与右侧值进行按位异或运算,并将结果赋值给左侧变量 | x ^= 3 |
x = x ^ 3 |
说明:
- 复合赋值运算符(如
+=、-=等):先执行对应的算术运算,再赋值给左侧变量。 - 位移赋值运算符:适用于二进制数的位运算操作,通常用于低级别的优化或位操作。
比较运算符
| 运算符 | 名称 | 描述 | 示例 | 结果 |
|---|---|---|---|---|
== |
相等 | 比较两个值是否相等(不比较类型,值相等即可) | 5 == "5" |
true |
=== |
严格相等 | 比较两个值及其类型是否严格相等 | 5 === "5" |
false |
!= |
不相等 | 比较两个值是否不相等(不比较类型) | 5 != "5" |
false |
!== |
严格不相等 | 比较两个值及其类型是否严格不相等 | 5 !== "5" |
true |
> |
大于 | 判断左侧值是否大于右侧值 | 10 > 5 |
true |
< |
小于 | 判断左侧值是否小于右侧值 | 10 < 5 |
false |
>= |
大于等于 | 判断左侧值是否大于或等于右侧值 | 10 >= 10 |
true |
<= |
小于等于 | 判断左侧值是否小于或等于右侧值 | 10 <= 9 |
false |
说明:
- 相等运算符 (
==):只比较值,类型不同但能转换的也会判定为相等(如数字5和字符串"5"相等)。 - 严格相等运算符 (
===):同时比较值和类型,只有值和类型都相同时才判定为相等。 - 不相等运算符 (
!=) 和严格不相等运算符 (!==):分别是相等和严格相等的反向判断。 - 大小比较运算符 (
>、<、>=、<=):用于比较数值大小,也可比较字符串(按字母顺序比较)。
条件语句
JavaScript 中的条件语句用于根据表达式的布尔值(
true或false)来执行不同的代码。常见的条件语句包括if、else if、else和switch语句
if 语句
if 语句用于在某个条件为 true 时执行代码。
1 | if (condition) { |
示例:
1 | let age = 18; |
if...else 语句
if...else 语句在条件为 true 时执行 if 块的代码,条件为 false 时执行 else 块的代码。
1 | if (condition) { |
示例:
1 | let age = 16; |
else if 语句
else if 语句用于处理多个条件。在第一个条件为 false 时,依次检查其他条件,直到找到一个为 true 的条件。
1 | if (condition1) { |
示例:
1 | let score = 85; |
switch 语句
switch 语句用于基于一个变量或表达式的值,在多个可能的值中执行相应的代码块。
1 | switch (expression) { |
示例:
1 | let day = 3; |
循环语句
for 循环
for 循环用于在指定次数内重复执行代码块,通常用于已知次数的循环。
语法:
1 | for (initialization; condition; update) { |
initialization:初始化变量。condition:循环条件,条件为true时继续执行。update:每次循环结束后更新变量的表达式。
示例:
1 | for (let i = 0; i < 5; i++) { |
while 循环
while 循环在条件为 true 时重复执行代码块。适用于循环次数不确定的情况。
语法:
1 | while (condition) { |
示例:
1 | let i = 0; |
do...while 循环
do...while 循环至少执行一次代码块,然后根据条件决定是否继续执行。适用于至少需要执行一次的情况。
语法:
1 | do { |
示例:
1 | let i = 0; |
for...in 循环
for...in 循环用于遍历对象的可枚举属性。
语法:
1 | for (let key in object) { |
示例:
1 | let person = {name: "Alice", age: 25}; |
for...of 循环
for...of 循环用于遍历可迭代对象(如数组、字符串、集合等)的值。
语法:
1 | for (let value of iterable) { |
示例:
1 | let numbers = [1, 2, 3, 4, 5]; |
break 和 continue
break:用于终止循环。continue:用于跳过当前循环的剩余部分,继续执行下一次循环。
示例(break):
1 | for (let i = 0; i < 5; i++) { |
示例(continue):
1 | for (let i = 0; i < 5; i++) { |
总结:
for循环:用于已知次数的循环。while循环:用于未知次数的循环,条件前检查。do...while循环:至少执行一次,条件后检查。for...in循环:遍历对象的属性。for...of循环:遍历可迭代对象的值。break和continue:用于控制循环的执行。
字符串
length方法
返回字符串的字符数。
1 | const str = "Hello"; |
charAt方法
返回字符串指定位置的字符
1 | var str = "0123456789"; |
传入数字超出字符串的话会返回空字符串
concat方法
连接两个或多个字符串,并返回一个新字符串。并且不改变原来字符串,如果传入的非字符串,会将其转化为字符串再连接
str1.concat(str2, str3, …, strN);
1 | const str1 = "Hello"; |
也可以使用+号进行字符串的连接
substring方法
提取字符串中两个指定索引之间的字符,并返回一个新字符串。
str.substring(start, end);
start:提取的起始索引(包含)。
end:提取的结束索引(不包含)。如果省略,默认为字符串的结束。
1 | const str = "Hello, World!"; |
-
负索引处理:
substring()不支持负索引,负数会被转换为 0。1
console.log(str.substring(-3, 5)); // "Hell"(起始变为 0)
-
参数顺序:如果
start大于end,则这两个参数会互换。1
console.log(str.substring(5, 0)); // "Hello"
-
不修改原字符串:
substring()不会修改原始字符串,始终返回一个新字符串。
substr方法
从一个字符串中提取指定长度的子字符串,并返回该子字符串。与
substring()和slice()方法不同,substr()需要提供提取的起始索引和子字符串的长度
1 | str.substr(start, length); |
1 | const str = "Hello, World!"; |
-
负索引:可以使用负数作为起始索引,从字符串的末尾开始提取。
1
console.log(str.substr(-6, 5)); // "World"
-
不修改原字符串:
substr()不会改变原始字符串,始终返回一个新字符串。 -
长度参数的处理:如果
length为负数或零,则返回空字符串。1
console.log(str.substr(0, 0)); // ""
indexOf方法
用于返回指定值在字符串中第一次出现的位置。如果未找到该值,则返回 -1。它是区分大小写的。
1 | str.indexOf(searchValue, fromIndex); |
1 | const str = "Hello, World!"; |
-
区分大小写:
indexOf()是区分大小写的,因此查找 “hello” 和 “Hello” 会返回不同的结果。1
console.log(str.indexOf("hello")); // -1
-
从指定位置开始查找:可以通过
fromIndex参数指定查找的起始位置。如果指定的索引大于或等于字符串的长度,则返回 -1。1
console.log(str.indexOf("o", 10)); // -1
-
返回的索引:如果找到匹配项,返回的是第一个匹配字符的索引(从 0 开始计数)。
trim方法
用于去除字符串两端的空格(包括空格、制表符和换行符),并返回一个新的字符串。它不会改变原始字符串,因为字符串在 JavaScript 中是不可变的。
语法
1 | str.trim(); |
示例
1 | const str = " Hello, World! "; |
特点
-
去除两端空格:
trim()只去除字符串开头和结尾的空格,字符串中间的空格不会被去除。1
2const str2 = " Hello, World! ";
console.log(str2.trim()); // "Hello, World!" -
不修改原字符串:
trim()方法返回一个新字符串,原始字符串不受影响。1
console.log(str); // " Hello, World! "
-
兼容性:
trim()是 ECMAScript 5(ES5)引入的,因此在现代浏览器和环境中广泛支持。
相关方法
trimStart()(或trimLeft()):去除字符串开头的空格。trimEnd()(或trimRight()):去除字符串结尾的空格。
示例
1 | const str = " Hello, World! "; |
trim() 方法在处理用户输入或清理数据时非常有用。如果你有具体的用例或问题,请告诉我!
split方法
split()方法用于将一个字符串分割成一个字符串数组,基于指定的分隔符。这个方法返回一个新数组,原始字符串不受影响。
语法
1 | str.split(separator, limit); |
- separator:用于分隔字符串的字符、正则表达式或字符串。如果省略,则整个字符串作为单一元素返回。
- limit(可选):一个整数,指定返回的数组的最大长度。
示例
1 | const str = "Hello, World!"; |
特点
-
多种分隔符:可以使用任意字符或正则表达式作为分隔符。
1
2
3const str2 = "one,two;three four";
const result2 = str2.split([,; ]/); // 使用正则表达式分割
console.log(result2); // ["one", "two", "three", "four"] -
限制返回元素数量:
limit参数可以限制返回的数组长度。1
2const str3 = "a,b,c,d,e";
console.log(str3.split(",", 3)); // ["a", "b", "c"] -
返回的数组:如果字符串中没有找到分隔符,返回的数组将只包含一个元素,即原始字符串。
1
2const noSeparator = "Hello";
console.log(noSeparator.split(",")); // ["Hello"]
使用场景
split() 方法常用于处理和解析字符串数据,比如从 CSV 文件中提取数据、处理用户输入等。
如果你对 split() 有更具体的问题或想了解其他相关内容,请告诉我!
数组
1 | let arr=['sxt','a','b',{"A":"b"}]; |
遍历
1 | for(var i =0 ;i<arr.length;i++) |
isArray()方法
1 | console.log(typeof(arr));//object |
Array.isArray()是 JavaScript 中用于检查一个值是否为数组的方法。它返回一个布尔值:如果该值是数组,则返回true,否则返回false。
语法
1 | Array.isArray(value) |
参数
- value: 需要检查的值。
示例
1 | console.log(Array.isArray([1, 2, 3])); // true |
这个方法非常有用,特别是在处理动态类型的数据时,确保你操作的确实是数组。
push()和pop()方法
push()和pop()是 JavaScript 数组的两个常用方法,用于管理数组的末尾元素。
push()
- 功能: 向数组末尾添加一个或多个元素。
- 返回值: 返回新数组的长度。
示例
1 | let arr = [1, 2, 3]; |
pop()
- 功能: 移除数组末尾的元素。
- 返回值: 返回被移除的元素。
示例
1 | let arr = [1, 2, 3, 4]; |
这两个方法常用于实现栈(LIFO)数据结构。
shift()和unshift()方法
shift()和unshift()是 JavaScript 数组中用于管理数组头部元素的方法。
shift()
- 功能: 移除数组的第一个元素。
- 返回值: 返回被移除的元素。
示例
1 | let arr = [1, 2, 3]; |
unshift()
- 功能: 向数组的开头添加一个或多个元素。
- 返回值: 返回新数组的长度。
示例
1 | let arr = [2, 3]; |
这两个方法常用于实现队列(FIFO)数据结构。
join()方法
join()是 JavaScript 数组的一个方法,用于将数组中的所有元素连接成一个字符串。可以指定一个分隔符,默认分隔符为逗号(,)。
语法
1 | array.join(separator) |
参数
- separator(可选):用于分隔每个元素的字符串。如果省略,则使用逗号作为默认分隔符。
示例
1 | let arr = ['Hello', 'World']; |
注意
- 如果数组中有
undefined或null,它们会被转换为字符串"undefined"或"null"。 - 如果数组为空,
join()返回一个空字符串。
concat()方法
concat()是 JavaScript 数组的方法,用于合并两个或多个数组。此方法不会改变原数组,而是返回一个新数组。
语法
1 | array1.concat(array2, array3, ..., arrayN) |
参数
- array2, array3, …, arrayN: 需要合并的一个或多个数组或值。
示例
1 | let arr1 = [1, 2, 3]; |
注意
concat()也可以接受非数组的参数,这些参数会被添加到新数组中。- 原始数组不受影响。
reverse()方法
reverse()是 JavaScript 数组的方法,用于反转数组中元素的顺序。该方法会直接修改原数组,并返回反转后的数组
语法
1 | array.reverse() |
示例
1 | let arr = [1, 2, 3, 4]; |
注意
- 该方法会改变原数组,所以如果需要保留原数组,可以先使用
slice()创建副本再反转。 - 反转空数组仍然是空数组。
indexOf()方法
indexOf()是 JavaScript 数组的方法,用于查找指定元素在数组中的第一个索引。如果找到了元素,则返回该元素的索引;如果未找到,则返回-1。
语法
1 | array.indexOf(element, fromIndex) |
参数
- element: 要查找的元素。
- fromIndex(可选): 开始查找的位置(索引)。默认值为
0。如果为负值,则从数组尾部开始查找。
示例
1 | let arr = [2, 5, 9, 2]; |
注意
indexOf()使用严格相等(===)进行比较,因此对不同类型的值(如数字和字符串)会返回-1。- 如果数组中存在多个相同的元素,
indexOf()只返回第一个匹配的索引。
函数
JavaScript 中的函数是可以被调用的代码块,用于执行特定任务或计算并返回值。函数可以接受参数并且可以返回结果,是实现代码复用和模块化的重要工具。
定义
1 | function functionName(parameters) { |
函数表达式
将一个函数赋值给一个变量,可以是命名函数或匿名函数
1 | const functionName = function(parameters) { |
1 | const add = function(a, b) { |
箭头函数
箭头函数是 ES6 中引入的一种简化的函数定义语法,使用箭头(
=>)表示。它更简洁,通常用于简化函数表达式。
1 | const functionName = (parameters) => { |
1 | const add = (a, b) => { |
特性
-
简洁语法: 如果箭头函数只有一个表达式,可以省略
{}和return。1
const add = (a, b) => a + b; // 更简洁的写法
-
this绑定: 箭头函数不具有自己的this,它的this是从外层函数中继承的。这使得在回调函数中引用外部上下文更加方便。1
2
3
4
5
6
7
8function Counter() {
this.count = 0;
setInterval(() => {
this.count++; // `this` 引用外部的 Counter
console.log(this.count);
}, 1000);
}
const counter = new Counter(); // 每秒输出递增的计数 -
不能作为构造函数: 箭头函数不能用
new关键字调用,因此不能被用作构造函数。 -
没有
arguments对象: 箭头函数不具有arguments对象,但可以使用剩余参数语法(...args)代替。
函数名的提升
指的是在代码执行之前,函数声明被提升到其所在作用域的顶部。这意味着在函数声明之前调用该函数是可以的。
函数提升的特性
-
函数声明的提升:
- 如果使用函数声明的方式定义函数,整个函数体会被提升,而不仅仅是函数名。
- 这使得你可以在函数声明之前调用它。
1
2
3
4
5console.log(greet()); // 输出 "Hello!"
function greet() {
return "Hello!";
} -
函数表达式的提升:
- 如果使用函数表达式(例如,赋值给变量),则只有变量的声明会被提升,而不会提升赋值。这意味着在赋值之前调用该函数会导致错误。
1
2
3
4
5console.log(greet()); // TypeError: greet is not a function
var greet = function() {
return "Hello!";
};
总结
- 函数声明可以在声明之前调用,因为整个函数体被提升。
- 函数表达式不能在赋值之前调用,因为只有变量的声明被提升。
理解函数提升有助于避免常见的错误和混淆。在编写代码时,尽量将函数调用放在函数声明之后,以提高代码的可读性。
对象
对象是用于存储多个值和复杂实体的基本数据结构。对象是无序的键值对集合,键(属性)通常是字符串或符号,值可以是任意数据类型,包括其他对象、数组、函数等,如果一个属性的值为函数,通常把这个属性称为方法,可以像函数一样调用,并且可以通过
this关键字访问对象的属性。
创建方式
1 | //1.字面量 |
读取方式
1 | //点语法 |
1 | var user={ |
遍历
1 | for(var key in user) |
Math对象
Math对象是 JavaScript 的内置对象,提供了丰富的数学常量和函数。Math对象本身是一个静态对象,因此不能创建实例,也不需要使用new关键字。
常用属性
-
Math.PI- 圆周率 π,约等于 3.14159。
1
console.log(Math.PI); // 3.141592653589793
-
Math.E- 自然对数的底数 e,约等于 2.71828。
1
console.log(Math.E); // 2.718281828459045
常用方法
-
Math.abs(x)- 返回 x 的绝对值。
1
console.log(Math.abs(-5)); // 5
-
Math.max(...values)- 返回一组数中的最大值。
1
console.log(Math.max(1, 3, 2)); // 3
-
Math.min(...values)- 返回一组数中的最小值。
1
console.log(Math.min(1, 3, 2)); // 1
-
Math.random()- 返回一个在 0(包含)到 1(不包含)之间的伪随机数。
1
console.log(Math.random()); // 随机数,例如 0.123456
-
Math.round(x)- 返回四舍五入后的整数。
1
console.log(Math.round(2.5)); // 3
-
Math.floor(x)- 返回小于或等于 x 的最大整数(向下取整)。
1
console.log(Math.floor(2.9)); // 2
-
Math.ceil(x)- 返回大于或等于 x 的最小整数(向上取整)。
1
console.log(Math.ceil(2.1)); // 3
-
Math.sqrt(x)- 返回 x 的平方根。
1
console.log(Math.sqrt(9)); // 3
-
Math.pow(base, exponent)- 返回 base 的 exponent 次方。
1
console.log(Math.pow(2, 3)); // 8
-
Math.sin(x)、Math.cos(x)、Math.tan(x)- 返回给定角度(以弧度为单位)的三角函数值。
1
console.log(Math.sin(Math.PI / 2)); // 1
Data对象
Date对象是 JavaScript 中用于处理日期和时间的内置对象。它提供了多种方法来创建、格式化和操作日期。
创建 Date 对象
-
当前日期和时间
1
2const now = new Date();
console.log(now); // 输出当前日期和时间 -
指定日期和时间
1
2const specificDate = new Date('2023-09-25T10:00:00');
console.log(specificDate); // 输出指定的日期和时间 -
使用时间戳
1
2const dateFromTimestamp = new Date(1633036800000); // 以毫秒为单位的时间戳,距离1970/1/1 00:00:00 UTC(格林威治时间) 1970/1/1 08:00:00(北京时间)
console.log(dateFromTimestamp);//Fri Oct 01 2021 05:20:00 GMT+0800 (中国标准时间)
常用方法
-
获取日期和时间信息
getFullYear(): 获取年份。getMonth(): 获取月份(0-11,0 代表 1 月)。getDate(): 获取日期(1-31)。getHours(): 获取小时(0-23)。getMinutes(): 获取分钟(0-59)。getSeconds(): 获取秒数(0-59)。getMilliseconds(): 获取毫秒数(0-999)。getTime(): 获取自1970年1月1日以来的毫秒数。
1
2
3const date = new Date('2023-09-25T10:00:00');
console.log(date.getFullYear()); // 2023
console.log(date.getMonth()); // 8(9月) -
设置日期和时间
setFullYear(year): 设置年份。setMonth(month): 设置月份。setDate(date): 设置日期。setHours(hours): 设置小时。setMinutes(minutes): 设置分钟。setSeconds(seconds): 设置秒数。setMilliseconds(milliseconds): 设置毫秒数。
1
2date.setFullYear(2024);
console.log(date); // 更新年份 -
日期格式化
toString(): 返回日期的字符串表示。toISOString(): 返回 ISO 格式的字符串。toLocaleString(): 根据本地时间格式返回字符串。
1
console.log(date.toISOString()); // '2024-09-25T10:00:00.000Z'
日期计算
可以通过直接操作 Date 对象的时间戳来进行日期计算,例如:
1 | const futureDate = new Date(); |
1 | function getLeftDays() |
DOM
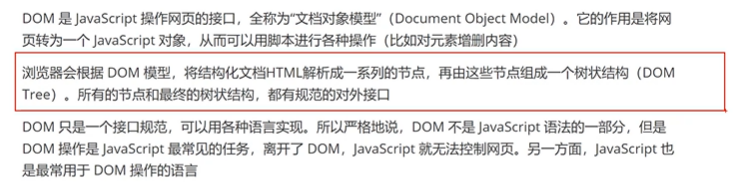
DOM(文档对象模型)是一个编程接口,是js操作网页的接口,用于表示和操作 HTML 和 XML 文档的结构。它将文档视为一个树形结构,文档中的每个部分(如元素、属性、文本)都被视为一个节点。作用就是将网页转化为一个js对象,从而可以用脚本进行各种操作
DOM 的基本概念
-
节点:DOM的最小组成单位, DOM 中的每个元素都是一个节点,节点类型包括:
-
元素节点(Element Node)
- 代表 HTML 或 XML 中的元素,如
<div>、<p>、<a>等。 - 可以通过
tagName属性获取节点的标签名。
文本节点(Text Node)
- 代表元素或属性中的文本内容。
- 文本节点通常是元素节点的子节点。
属性节点(Attribute Node)
- 代表元素的属性(如
class、id)。 - 属性节点不是 DOM 的直接节点类型,但可以通过元素节点访问。
文档节点(Document Node)
- 代表整个文档,是 DOM 树的根节点。
- 可以通过
document对象访问。
文档片段节点(DocumentFragment Node)
- 轻量级的容器,用于临时存储一组节点。
- 可以高效地操作多个节点,避免频繁更新 DOM。
注释节点(Comment Node)
- 代表文档中的注释。
- 用于在 HTML 或 XML 中添加注释。
Doctype 节点(DocumentType Node)
- 代表文档类型声明(如
<!DOCTYPE html>)。 - 提供文档的类型信息。
- 代表 HTML 或 XML 中的元素,如
-
-
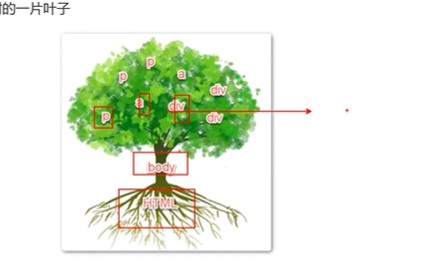
树结构: DOM 以树形结构表示文档,
文档节点为根节点,所有其他节点为其子节点。
-
节点之间的关系
-父节点关系
-子节点关系
-同级节点关系
-
Node.nodeType属性
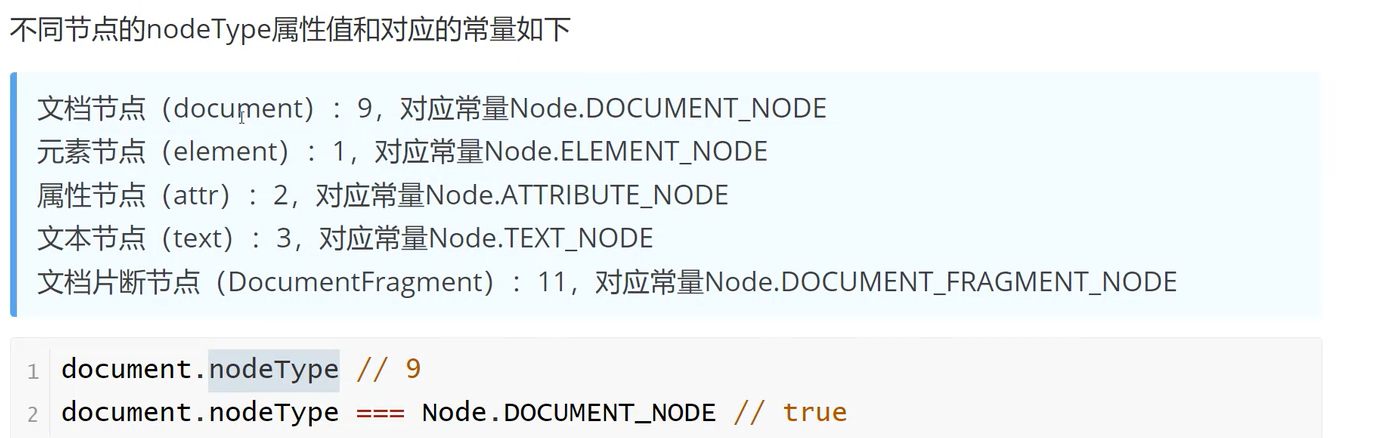
DOM 的方法
-
选择元素:
document.getElementById(id): 根据 ID 选择元素。document.getElementsByClassName(className): 根据类名选择元素。document.getElementsByTagName(tagName): 根据标签名选择元素。document.querySelector(selector): 根据 CSS 选择器选择第一个匹配的元素。document.querySelectorAll(selector): 根据 CSS 选择器选择所有匹配的元素。
-
创建元素:
1
2
3const newDiv = document.createElement('div'); // 创建新元素
newDiv.textContent = 'Hello, World!'; // 设置文本
document.body.appendChild(newDiv); // 添加到文档1
2
3
4
5
6
7
8
9
10
11
12
13
14
15
16
17
18
19
20
21
22
23
24
25
26
27
28
29
30
31
32
<html>
<head>
<title>my page</title>
<meta charset="utf-8">
</head>
<body>
<div id="container"></div>
<script>
//创建元素
var text = document.createElement("p");//创建p标签
var content = document.createTextNode("我是文本");
var id = document.createAttribute("id");
id.value = "root";
//appendChild 将内容或者子元素放入容器中
text.appendChild(content);
text.setAttributeNode(id);//属性比较特别
console.log(text);
//将上述节点塞到文本树中
var container = document.getElementById("container");
container.appendChild(text);
</script>
</body>
</html>
Element对象属性
Element对象对应网页的HTML元素,每一个元素在DOM树上都会转化为Element节点对象
Element .id
返回指定元素的id属性,可读写
1 | <div class = "box" id="root"> hexo </div> |
Element .className
用来读写当前元素节点的class属性,它的值是一个字符串,每个class之间用空格分隔
1 | var root = document.getElementById("root"); |
Element .classList
该对象有以下方法:
add():增加一个clas
remove():移除一个class
contains():检查当前元素是否包含某个class,有返回True
toggle():将某个class移入或者移出当前元素,存在删除,不存在就添加
innerHTML和innerText
1 | console.log(root.innerHTML);//读取 |
- 使用
innerHTML时,可以处理 HTML 标签和结构,而innerText只处理文本内容。 innerHTML适合需要插入和处理 HTML 的情况,而innerText更适合简单的文本内容处理,尤其是在需要避免潜在的 XSS(跨站脚本攻击)时。
DOM 事件
DOM 允许你处理用户与网页的交互。常见事件包括:
click: 鼠标点击。mouseover: 鼠标悬停。keydown: 键盘按下。submit: 表单提交。